Replacing FA-430 Filters

Replacing FA-430 filters regularly is important to maximise the operational efficiency and efficacy of the equipment and to ensure the best protection for users.
Replacing the Pre-filter
1. When the pre-filter light is lit, it is time to replace the pre-filter.

2. Turn the knob to the "Reset Position" with the power switch on (the fan will stop).

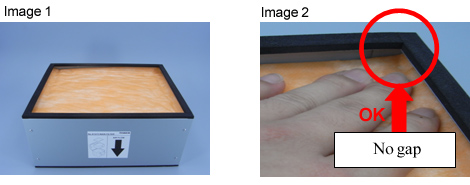
3. Open the upper cover and remove the pre-filter only. Replace a new pre-filter on top of the main filter (ensure no gaps at the corner).

4. Close the upper cover and turn the knob back to the original settings after replacing the pre-filter.

Replacing the Main Filter
1. When both the main filter and the pre-filter lights are lit, replace the main filter with a brand new one. It is important to use a new filter instead of lifting and putting the old one back down to ensure proper filtration.

2. Turn the knob to the "Reset Position" with the power switch on (the fan will stop).

3. Open the upper cover and remove both the pre and main filters. Replace the main filter and pre filter (A1573 HEPA main filter may be used for extra protection).

4. Close the upper cover and turn the knob back to the original settings.

**The pre-filter light will light up when the system reaches 200hr mark or when the system's airflow is restricted, causing a small vacuum effect which makes the motor run faster. The main filter light will light up after the 10th pre-filter change or when the system reaches 2000hr operation mark.
Check out Hakko FA-430 Features!
Learn about the importance of fume extraction!