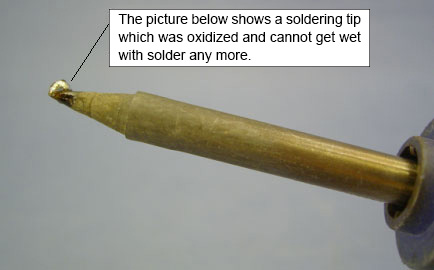
With prolonged usage or when operating at high heat, the soldering tip, enclosure pipe and nut can be easily oxidized. When a layer of oxide forms on the surface of the metal parts, it affects the heat conductivity and causes the tip temperature to be lower than the actual temperature set on the soldering station.
To compensate for the lower heat conductivity, many users often increase the temperature on the soldering station. However, this leads to a continuous cycle of oxide forming on the tip and requiring a higher temperature to melt the solder wire.
Tips to Measure Tip Temperature
Measuring the tip temperature daily or at the start of each soldering session can alert the user of any deviations from the set temperature and prevent the issue from worsening.
- Use the FG-101B or FG-100B to measure the tip temperature.
- Clean the soldering tip, enclosure pipe and nut to remove oxidation before measuring temperature.
- If the oxidation is severe, change to brand new components.
- Adding a bit of solder on the tip can aid in a more accurate thermometer reading.
- Avoid air-conditioned rooms or direct wind/airflow which can cause inaccurate readings.
- Lay the tip at a 45° angle on the thermometer sensor for a more accurate reading.
NOTE: It is normal for tip temperature to change when switching between different tip shapes due to its different thermal capacity (e.g Shape B to Shape I). Calibration is required each time the tip is changed.
Differences in tip temperature can also be affected by other factors. Click here to find out the other factors that could affect the tip temperature.